(Yes, you CAN do it yourself!)
As we spent more time at home last year, it was a good opportunity to start those home improvement projects I always wanted to try. A few years ago I installed a faux shiplap wall, but this year decided I was up for trying the real deal. During the end of 2020, I installed shiplap walls in the kids bathroom, my powder room, and most recently the dining room. There is something special to completing a project like this yourself, and I’m proud every time I walk by one of the projects.


I wanted to share what I learned from my own projects with you guys, mistakes and all. Yes, I said mistakes. We all make them. (There may even have been a few swear words, but we will keep that between me and the walls.).
Before Getting Started:
1. When considering which planks to use, consider if you want a beveled edge with small gaps, or a hard link between planks. Tongue and groove boards lock into one another, like a key and a lock. Other shiplap planks have an indented edge that you simply place on the one below. They both have a different look, so consider what aesthetic you are going for before buying. I think that the tongue and groove are easier to install. Invest in the quality of the wood too, cheaper versions often have lots of knot holes and will be warped.


2. Decide whether you want horizontal or vertical plank. A vertical plank gives a more modern esthetic, and horizontal a more traditional farmhouse feel. Check out @Workyourcloset to see the updated vertical look that designer’s own home (Jamie one of my favorite bloggers and designers, and a central Floridian for all you Orlando folks out there.)

3. Measure Twice. Three. Maybe four times. If you have to go back out and buy more wood, it’s not the end of the world but takes more time. If you aren’t good with measuring and marking detailed notches that need to be cut around light sockets and fixtures, consider making a paper template to trace.
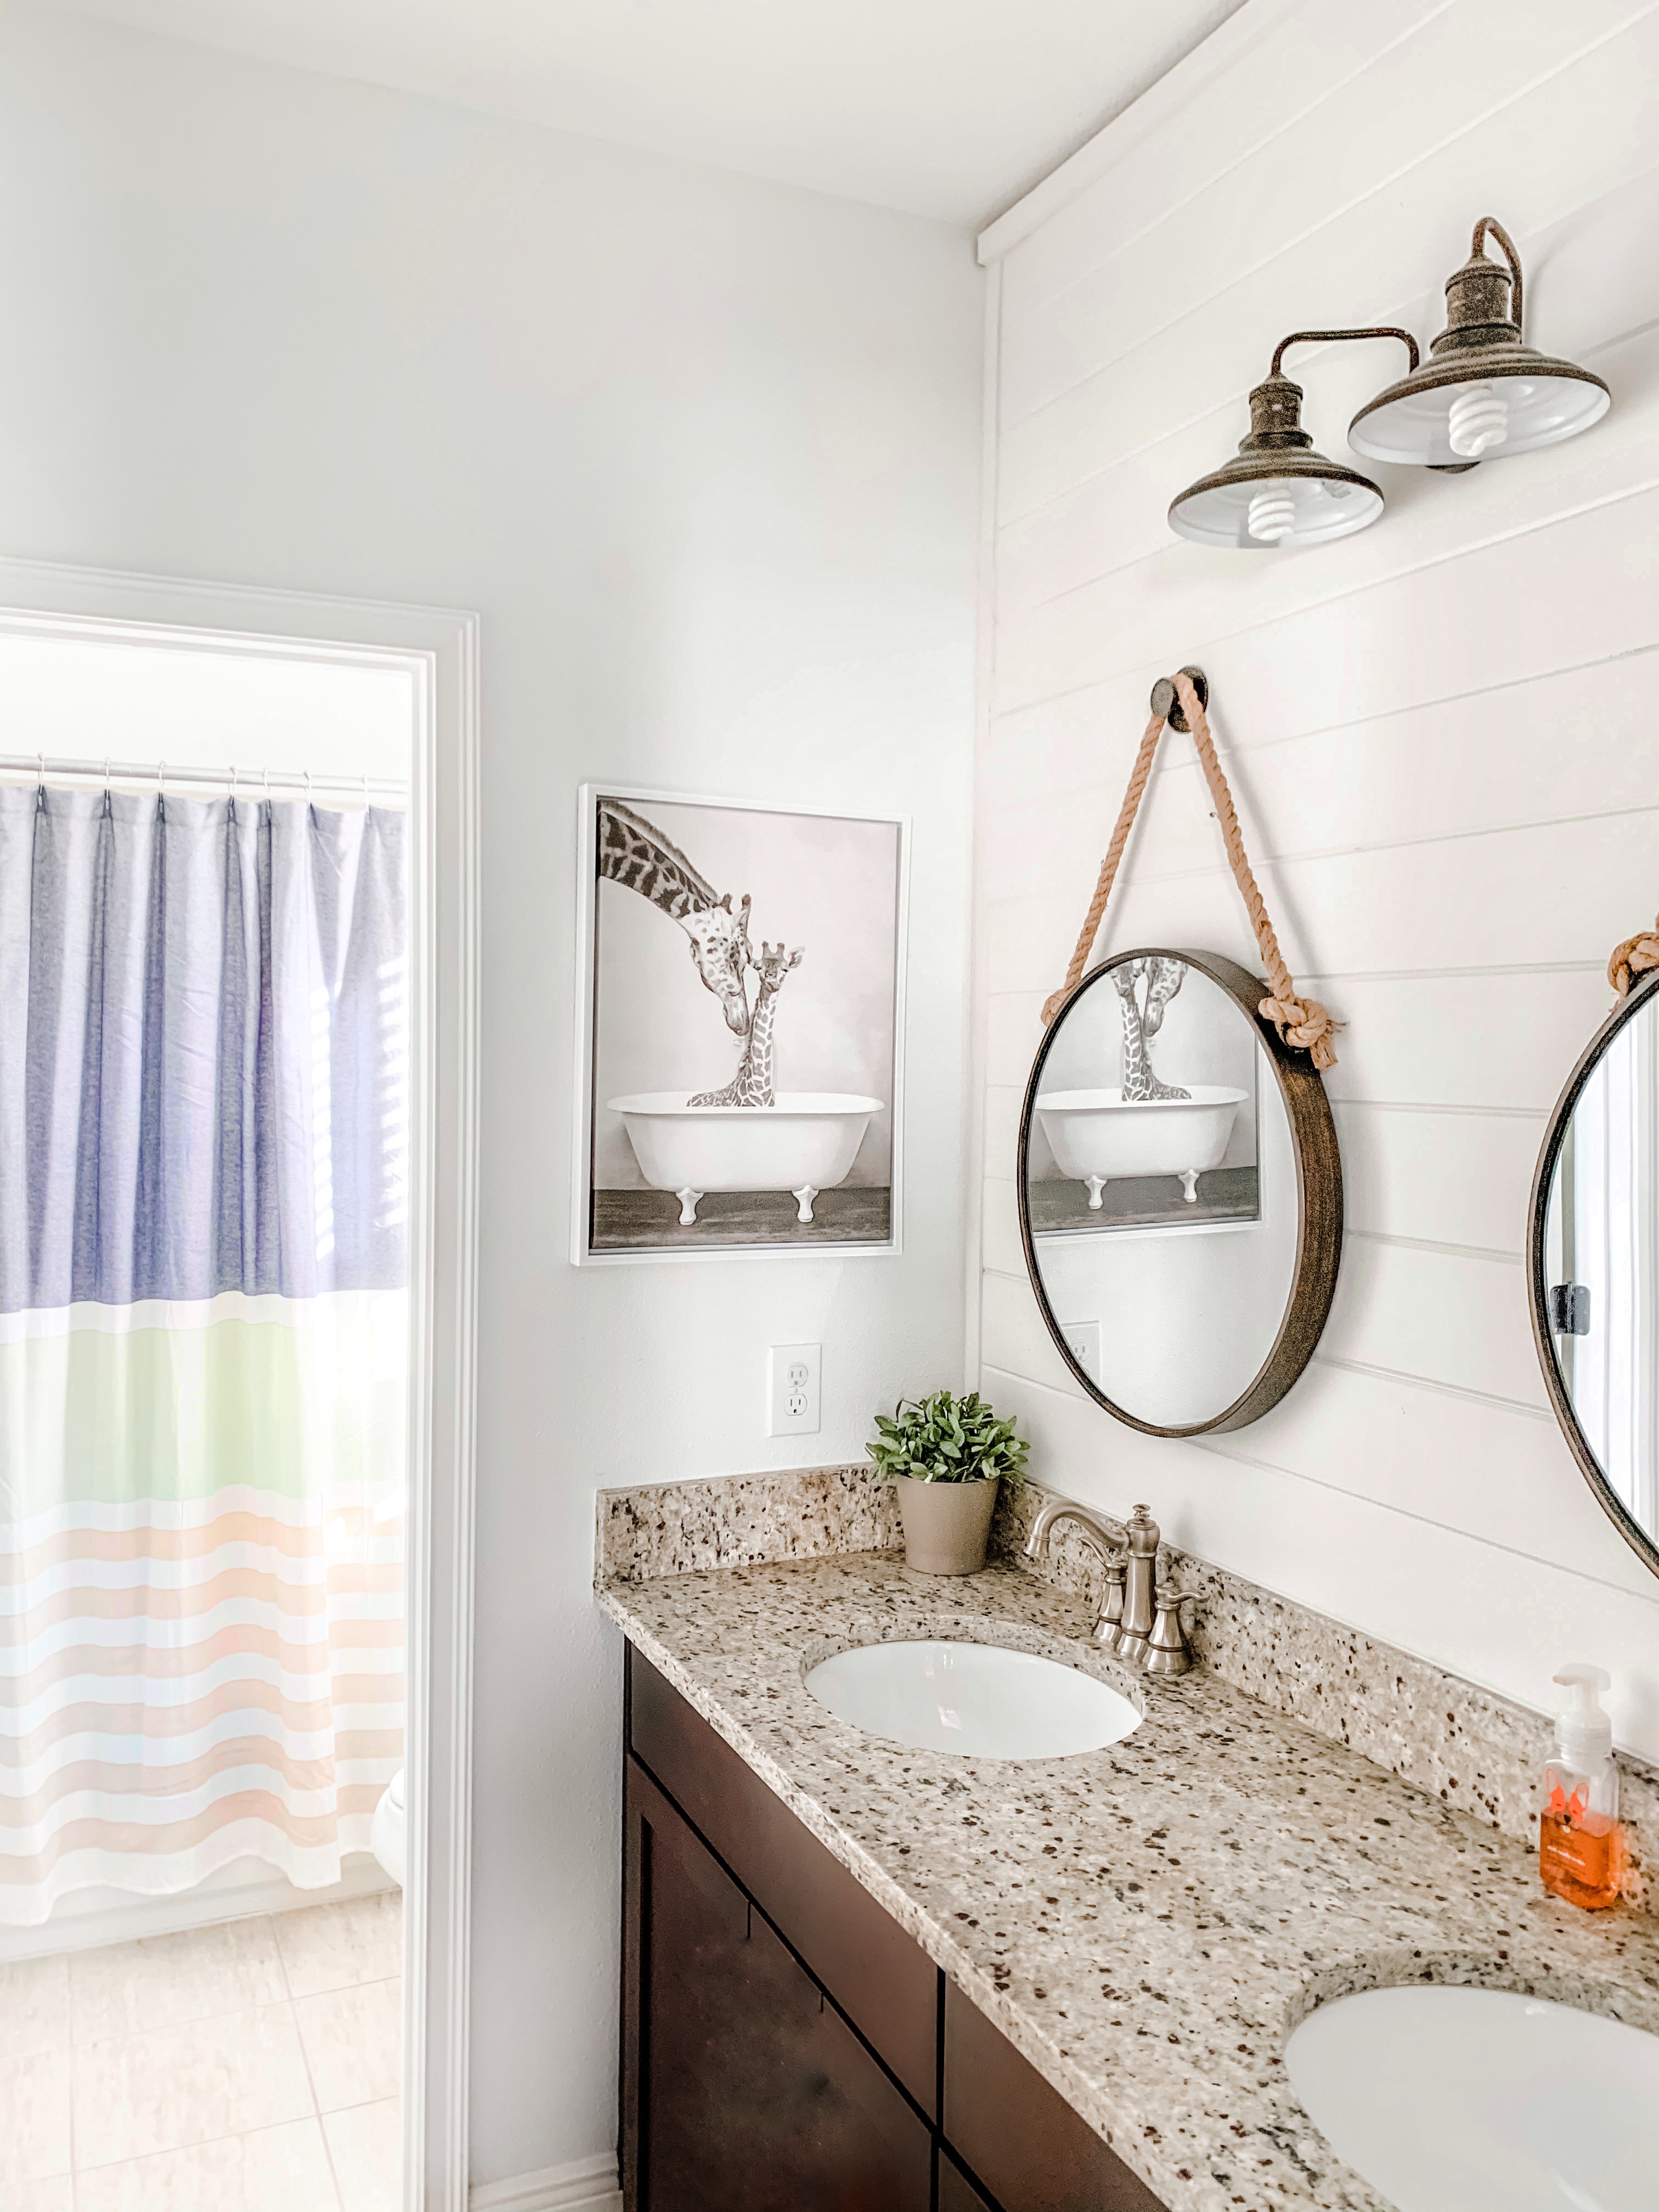
4. Consider the number of electrical outlets, light switches and light fixtures you will need to address on your wall before beginning. Each one will need to be brought flush with the new wall with an extender box. You may want to consider talking with an electrician if you aren’t comfortable with this part. My father-in-law Tom helped me a lot with learning more about saws and the electrical work in the dining room, spending two days with me and patiently teaching me, and my husband Matt helped hang the fixtures in the bathroom. I’m not the best with those things but learning!
5. Invest in quality materials and tools, especially a saw and nail gun. The nail gun is one of my favorite things to use and makes installation a snap. I’ve included a shopping list below to get you started.

Shopping List:
- Wood, which includes Tongue and Groove, Planks, Trim Pieces, and Crown Moulding
- Nail Gun and Brads
- Electric Saw (Smaller Handheld Dremmel or Circular Saw)
- Sandpaper Block
- Level
- Caulking
- Wood Filler
- Primer
- Paint
- Stud finder
- Electric Box Extenders and Longer Screws (length will depend on the thickness of the wood)
- Ladder
Installation:
1. Take all measurements twice to make sure you have it right. Check out the dimensions of the wood you want to install prior to getting to the store so you can calculate the amount of wood you will need at home before arriving at the store to purchase it.
2. With very accurate measurements, you can have the wood cut for you at Lowes. Get the big wood cart. You will want a saw to help cut trim pieces, notches out of the wood for around electrical outlets and light fixtures, and trim any larger pieces.
3. Plan for how to get the wood home. I have an SUV so getting 8 or 10 foot planks is possible in my vehicle, but not all cars. Consider asking a friend with a truck or SUV to help you get the supplies, or consider cutting the planks into smaller pieces to fit. Sand the edges slightly before installing.

4. Use a stud finder to locate studs in the wall to better anchor heavy pieces. This is where you will want to nail in the boards, especially the walls with longer/heavier pieces. Locate at a few points on the same line going up the wall for each and mark with a pencil, then extend the line up using a level.

5. If you will be working with light switches, fixtures or outlets, make sure to turn the power off at the electrical box before doing anything. If the room is not well let, bring a light in with an extension cord from another room.
6. Start at a bottom corner and place first board on. Before nailing, check to make sure the board is level. If you use molding and trim work on your walls, you can get away with small gaps and uneven edges on the side of the walls. Be sure to nail into the studs along the length of the board and ends at the top and bottom. If it’s the plank version, place the longer lip on the outside at the bottom. If you use the tongue and groove version, the opening will go at the bottom and ridge at the top. If you find one of your planks is warped, consider cutting down the length it to make the bend in the wood less apparent and easier to hang on the wall.

7. If you have a wall that will take more than one piece, cut the piece as needed and then lay the next board adjacent to your first and check to make sure it is level once again. Try to make sure the boards align closely, but if you have a small gap because of an uneven edge, you can fill that later with the wood filler.
8. As you run into unusual angles along the edge of the wall, or to cut around light fixture/socket openings and are having trouble getting the measurements right, consider making a paper template and using that to cross check your measurements or directly mark on the wood using the template.
9. For the second row, start on top of your first piece. Depending on the type of board, it will either sit on top of the previous piece if using the planks, or lock into place down on top of the prior piece if using the tongue and groove. Continue until the wall is covered.
10. If you have any outlets, after the power is turned off you can start working on installing the electrical box extenders. Take a photo of how the wiring was initially set up to help guide you when you reinstall. You place the box directly inside the space where the wiring is now but flush with the new board so it is level the whole way across. Next you will pull the wiring, switch and/or plug through the opening and reattach the wires as needed and then using the larger screws tighten the extender into the wall and fixture. I found this resource (click here!) to help explain the process in more detail and show detailed depictions – they did a great job! If in doubt, please error on the side of caution and call an electrician.

11. After you have finished laying the initial wall, it’s time to install the trim pieces and molding. When selecting your trim pieces, be sure to select pieces that are wide enough to cover any gaps and uneven edges against the wall. Ideally the molding should be installed first across the top of the wall, and the trim pieces measured and cut to fit below. These pieces will help give you a cohesive look.

12. After you have finished laying the wall, use the wood filler to smooth over any knot holes and nail/brad holes. On my large wall in my dining room there were several large knots that I was able to fill in pretty well. Don’t worry about getting it perfectly smooth because you will use sandpaper to smooth the surface and it will all look pretty seamless. At the same time, use the caulking to fill in any cracks or gaps in the seams that stand out. These both dry relatively quickly, but be sure to leave enough time for each to dry completely before sanding, painting or priming.

13. After the wall is all patched and sealed up, I use a good base primer to help protect and seal the wood, and make it easier to paint. Unlike painted walls, fresh wood seems to eat up paint quickly. Priming will help reduce the number of coats of paint that you will ultimately need.


14. The day after the primer has dried, you can begin to paint. If you have picked a shiplap board that has a sharp cut edge vs a beveled edge, you may want to consider painting the boards before installation to cover hard to reach interior edges between the pieces of wood. I primed with white paint, so the edges weren’t very apparent at first, but a dark gray or navy will really make the natural wood seams stand out (I learned the hard way). To fix that, I improvised and used a pipe cleaner dipped in paint as a tool and ran along each and every seam on my dining room wall.


I love how wallpaper, cement tile, and paint color can instantly transform a room, but I love the subtle dimension that shiplap and wood moulding adds to a room.
.


Leave a Reply